As an affiliate partner, One of Seven Project earns a commission for purchases made through any product, brand logo links, or banner ads on this page. Thanks for your support!

For more information on the Colorado Trail visit our CT Resource page. »
So you’re planning to race/tour the Colorado Trail. In the past, planning a race/tour of the CT was time consuming and complex. The needed information was scattered all over the web. Knowing about planning for long trips, I put together this Colorado Trail Planning Guide to make things easier for you.
There are a ton of questions when planning a bikepacking trip. Things like, which gear to bring, how to get to and from the trail, and probably the most asked question is how to resupply. Answers to these and many others can be found throughout this page and at our other CTR focused pages. 7 Steps is all it takes to plan your own race/tour of the Colorado Trail. Don’t let this stop you from doing your own research to ensure the best odds of completing the CTR.
Planning is probably the single biggest thing that can effect the outcome of your Colorado Trail Race/Tour. More information means more options, equaling a better chance at success. Knowing things like where the route is or where to supply are key. The bottom line is, “DO YOUR HOMEWORK!”. Read on to plan your own race/tour fo the CTR with this Colorado Trail Planning Guide.
Shopping with our affiliates helps fund the development of content like this.
RACING PROS:
TOURING PROS:
RACING CONS:
TOURING CONS:
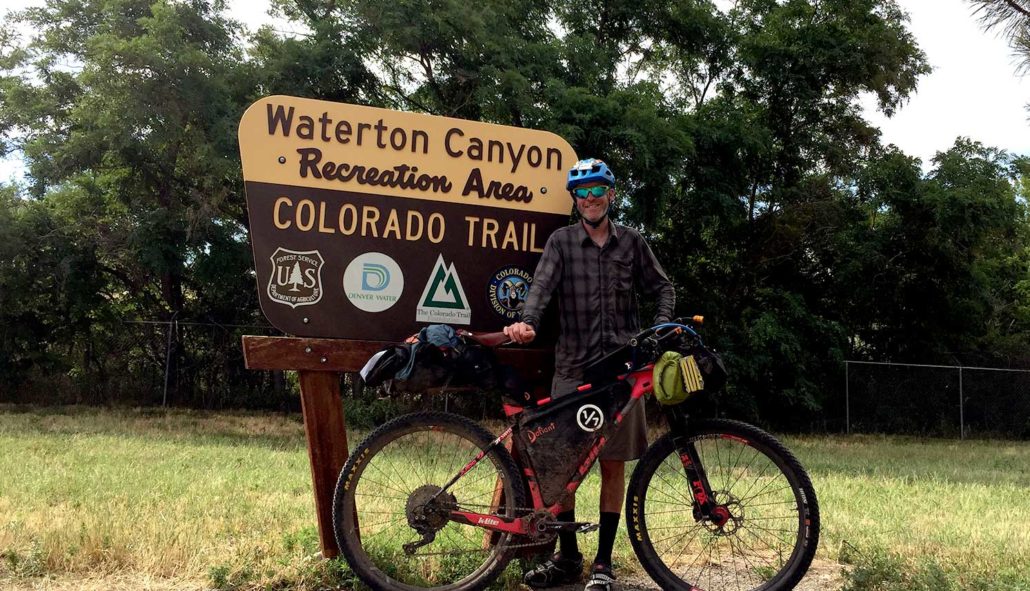
The race is on Aug. 11, 2024 at 4am at Waterton Canyon.
Racing is not for everyone. The best time to ensure a successful trip is to consider a date between July and September. Unfortunately this window is also monsoon season, so be ready to get over high passes and be down to lower elevations by earlier afternoon.
Snow still lingers in early July on the higher passes and north facing slopes. The best month to probably tour would be August. In September snow and cold temperatures become an issue once again.

If you’re racing you still want to have a general plan of where you want to be and how long it should take you to get there. Think about creating a chart/PDF that shows the resupply spots along the route, with mileages, hours of operation, distances between them, and then include when you should be at each for the given amount of days you hope to finish in. You may want to put the data for a range of days as the chances are pretty good you may be faster or slower depending on that year’s conditions (or your own conditioning). Put this information in your phone so you have easy access to it.
If all that seems like too much work you can purchase one of The Project’s Planning Aids instead.
Just like with racing, it’s a good idea to have a loose plan of where and when you want to be at certain locations. Knowing where your resupply options are, distances between food or water options, are things to consider when planning your trip.
Note any particular locations along the route that you definitely want to stop at or any side trips you might want to do. Don’t forget to plan for travel time to and from the trailhead. If your touring consider planning in a Zero Day.
Whether you’re racing or just touring the CTR you should at least have a rudimentary itinerary. You don’t need to stick to it, but the simple act of making it will help you familiarize yourself with the route. Having an itinerary is a good way to stay focused and also remind you of what your goal is.
In the accompanying “Bikepacking, pre-trip considerations” post, there’s more details on Itineraries. Covering a wide array of subjects like making a plan, gear, to health and personal considerations, and dealing with electronics.
Both the Colorado Trail Foundation and the jwookieone.com are good reference points.
Below you’ll see an example. There’s a link to make a copy. This link also will supply you with Gear Lists, Planning Checklist, Mail Drop Sheet, and Food Planner.

This spreed sheet is available on Google Docs, Please go to “Edit”, then select, ” Copy”. When pasting use Control(Command) – Shift – Paste or it won’t work. You’ll have to adjust column sizes. Then make all the changes you like! Happy planning and trails.
A big part of setting up an Itinerary is knowing what’s available and how difficult something is. Do you due diligence and collect all the information you can.
The above maps are meant to compliment our Planning Aids, and help riders plan their resupply before they leave and while on trail. You can also use them as GPX back ups on your phone.
Before 2015 the Colorado Trail Race always travelled North to South. In 2015 it was decided that on odd years the race would be raced South to North. Even years are raced North to South.
When you decide to tour the Colorado Trail you have to consider multiple factors in picking a direction of travel. Both directions have their advantages and disadvantages. Let’s look at them below
The Project conducts an ongoing rider survey to help new riders try to figure out what gear to use during the Colorado Trail Race. Undertaking a ride/adventure like the CTR can be very intimidating and the planning can be overwhelming. It’s our hope this survey will help new riders with their planning and execution of their CTR, as well as help ensure riders are more properly prepared for their adventure.
***Please pay attention to the examples for the questions where you have to type in your answer. If answers are not entered EXACTLY like the example I have to go in and correct them and it also throws off the results. Thanks in advance!

Covers: bikes, suspension, tires & wheels, drivetrain, and Components.
Covers: navigation planning, camping, logistic/travel, clothes, and more.


One package including our two most popular planning aids.


One package including all of our planning aids.
Available in both SOBO and NOBO versions and ONLY in US Standard units.
Small Bundle – $40.00 + tax (CO only) *You save $10 when you bundle!
Big Bundle – $60.00 + tax (CO only) *You save $20 when you bundle!


Gives you the most information of any planning aid.


Similar to the Data Sheet, with slightly less information, but displayed showing cumulative mileage and elevation gain.
Data Sheet includes:
Town List includes:
All versions of the Town Lists are ONLY available as part of the Small or Big Bundles.
Available in both SOBO and NOBO versions and ONLY in US Standard units.
Data Sheet – $25 + Tax (CO only)
Example of Data Sheet
Example of Town List


DATA SHEET and TOWN LIST DIFFERENCES
The Data Sheet has the most info. It gives the distance, elevation +/-, average grade, maximum and minimum elevations, pavement sections, references ACA maps, bike shops, resupply options, and has key notes between two POI. Example: A and B, then B to C, and so on.
The Town List gives cumulative distances between POI. Example: A to B, A to C, A to D. The next section would be B to C, B to D, B to E, and so on. The Town List has distance, elevation +/-, resupply options, bike shops and key notes.
The Town List helps with not having to do the math to figure out how far away things are if they’re not the next POI.


Quickly find the total mileage between any two POI along the route.


Quickly find the total elevation gain between any two POI along the route.
The Mileage and Elevation Gain Charts are ONLY available as part of the Big Bundle.
Example of Mileage Chart
Example of Elevation Gain Chart


Picking gear for a trip is always fun and a chance to buy new toys! The key to bikepacking gear is to keep it light. You really want to trim down what you carry. Of course if your touring then your gear list is going to be longer with more comfort built in. You can find a list of what I carried during my Colorado Trail Race on my gear page. or what I would carry if I did it again in my “If I Rode…” series. Try to carry items that serve multiple purposes, thus saving weight and space.
The most important part of the gear selection process is, once you’re done, TEST TEST TEST. You’re not going to nail the perfect set up the first time. Get out and test different pieces of gear. Rearrange where you pack items (both on the bike and either on you or the bike). Find the best option and keep improving it.
The basics most racers carry are: GPS, lights, rain gear, tent/bivy/tarp, sleeping bag, pad, puffy, tools, tubes/spare parts, something to carry extra water, and first aid. Some other extras one might carry are: filter, stove, camp clothes, MP3 player, and spare socks or gloves.
As mentioned, if you’re touring then you can bring a little more comfort. Don’t go over board just because you’re not racing. You still have to cover the same ground as the racers, so less is still best. Those touring should definitely consider bringing a stove. Most distances between resupply options aren’t that far for those racing but they are too far for those going at a slower pace.
The Colorado Trail Race is extremely physically and mentally demanding. Even the most seasoned veterans are challenged by the CTR. I strongly believe mental toughness is more important than physical strength when talking about bikepacking. Don’t get me wrong you need to be in good shape to race the Colorado Trail Race but if you’re not mentally ready, you’ll probably not finish.
The Colorado Trail Race has a ton of H.A.B, so one needs to be proficient at pushing, carrying or lifting their bike. Consider how much weight you want on your bike verse on your back. A lighter bike is easier to push but means more weight on you.
If you plan on doing any strength training don’t neglect your upper body. My arms were more tired than my legs most days. Lunges, boxes jumps, squats, and other lower body exercising are great. Workout your core to ensure you don’t experience lower back pain and work those arms.
Mental training is hard to do. One way to do it is to go on longer and longer rides so you can experience what your mind does as it and your body get more fatigued. It can be hard to objectively evaluate yourself but work at it and really know your strengths and more importantly, your weakness. It’s your weaknesses that will cause you to not finish. I always found it hard to keep going once it got dark. Practice riding at night.
Night riding.
Write down why your doing it, REMINDERS.
Make motivational play lists.
Be realistic with your goals, don’t over shoot your physically ability.
While on the trail don’t get caught up too much when it comes to crunching the numbers. Things change daily, hourly or by the minute.

As I pointed out in the gear section, no one figures out their set up the first go around. Make a point to go out and test not only your gear but yourself. Whether you’re racing or touring the benefits of doing one or many Shakedown Rides is immeasurable. If you look at my three set ups from my Bikepacking Triple Crown you can see how things change and progressed.
SUPPORT THE COLORADO TRAIL FOUNDATION
The Colorado Trail Foundation are the acting stewards of the trail and help manage/maintain it. Because of them and their members you have this amazing trail to ride. Please consider donating or joining a work crew, so they may continue their amazing work.
Everything you need to plan a bikepacking trip on the CTR.
Your ultimate bikepacking guide to the CTR.
 https://oneofsevenproject.com/wp-content/uploads/2020/03/Untitled-design-49.jpg
857
1493
Craig Fowler
http://oneofsevenproject.com/wp-content/uploads/2017/01/1of7-logo-lockup-grey-1132x212-300x56.png
Craig Fowler2020-03-26 19:58:502024-06-20 08:40:17Gear Review - If I Rode the Colorado Trail Race Again
https://oneofsevenproject.com/wp-content/uploads/2020/03/Untitled-design-49.jpg
857
1493
Craig Fowler
http://oneofsevenproject.com/wp-content/uploads/2017/01/1of7-logo-lockup-grey-1132x212-300x56.png
Craig Fowler2020-03-26 19:58:502024-06-20 08:40:17Gear Review - If I Rode the Colorado Trail Race Again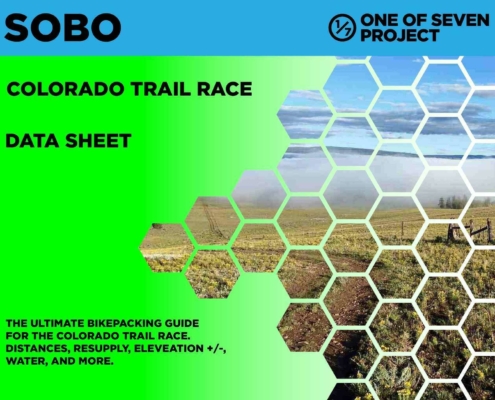 https://oneofsevenproject.com/wp-content/uploads/2023/12/rsz_2024_ctr_ds_sb_10.jpg
1275
1650
Craig Fowler
http://oneofsevenproject.com/wp-content/uploads/2017/01/1of7-logo-lockup-grey-1132x212-300x56.png
Craig Fowler2020-03-06 20:01:362024-06-20 08:40:54Colorado Trail Race Planning Aids
https://oneofsevenproject.com/wp-content/uploads/2023/12/rsz_2024_ctr_ds_sb_10.jpg
1275
1650
Craig Fowler
http://oneofsevenproject.com/wp-content/uploads/2017/01/1of7-logo-lockup-grey-1132x212-300x56.png
Craig Fowler2020-03-06 20:01:362024-06-20 08:40:54Colorado Trail Race Planning Aids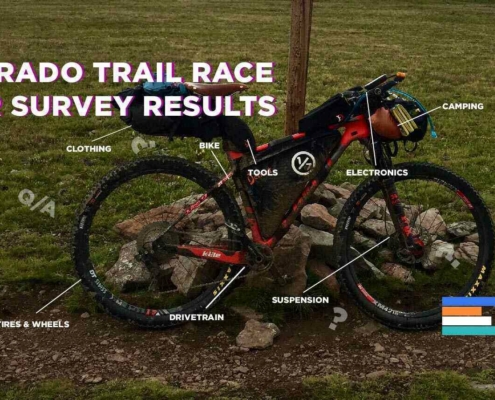 https://oneofsevenproject.com/wp-content/uploads/2019/11/rsz_ctr_sr_cover_2.jpg
857
1493
Craig Fowler
http://oneofsevenproject.com/wp-content/uploads/2017/01/1of7-logo-lockup-grey-1132x212-300x56.png
Craig Fowler2019-11-04 20:29:022024-06-20 08:49:11Colorado Trail Rider Survey Results
https://oneofsevenproject.com/wp-content/uploads/2019/11/rsz_ctr_sr_cover_2.jpg
857
1493
Craig Fowler
http://oneofsevenproject.com/wp-content/uploads/2017/01/1of7-logo-lockup-grey-1132x212-300x56.png
Craig Fowler2019-11-04 20:29:022024-06-20 08:49:11Colorado Trail Rider Survey Results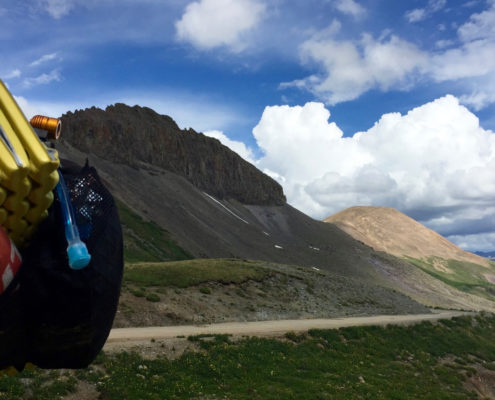 https://oneofsevenproject.com/wp-content/uploads/2018/11/Untitled-design-15-1.jpg
857
1493
Craig Fowler
http://oneofsevenproject.com/wp-content/uploads/2017/01/1of7-logo-lockup-grey-1132x212-300x56.png
Craig Fowler2018-04-11 10:39:532024-07-24 12:06:34Colorado Trail Planning Guide
https://oneofsevenproject.com/wp-content/uploads/2018/11/Untitled-design-15-1.jpg
857
1493
Craig Fowler
http://oneofsevenproject.com/wp-content/uploads/2017/01/1of7-logo-lockup-grey-1132x212-300x56.png
Craig Fowler2018-04-11 10:39:532024-07-24 12:06:34Colorado Trail Planning Guide https://oneofsevenproject.com/wp-content/uploads/2018/11/Untitled-design-14.jpg
857
1493
Craig Fowler
http://oneofsevenproject.com/wp-content/uploads/2017/01/1of7-logo-lockup-grey-1132x212-300x56.png
Craig Fowler2018-04-11 10:37:482024-07-24 11:39:32Colorado Trail Transportation Guide
https://oneofsevenproject.com/wp-content/uploads/2018/11/Untitled-design-14.jpg
857
1493
Craig Fowler
http://oneofsevenproject.com/wp-content/uploads/2017/01/1of7-logo-lockup-grey-1132x212-300x56.png
Craig Fowler2018-04-11 10:37:482024-07-24 11:39:32Colorado Trail Transportation Guide https://oneofsevenproject.com/wp-content/uploads/2018/04/rsz_1img_6609.jpg
857
1493
Craig Fowler
http://oneofsevenproject.com/wp-content/uploads/2017/01/1of7-logo-lockup-grey-1132x212-300x56.png
Craig Fowler2018-04-11 10:36:462024-07-24 12:25:32Colorado Trail Resupply Guide
https://oneofsevenproject.com/wp-content/uploads/2018/04/rsz_1img_6609.jpg
857
1493
Craig Fowler
http://oneofsevenproject.com/wp-content/uploads/2017/01/1of7-logo-lockup-grey-1132x212-300x56.png
Craig Fowler2018-04-11 10:36:462024-07-24 12:25:32Colorado Trail Resupply Guide


Simply clicking on the links below with our affiliates supports the Project.
Or checkout our Deals page to save big!


