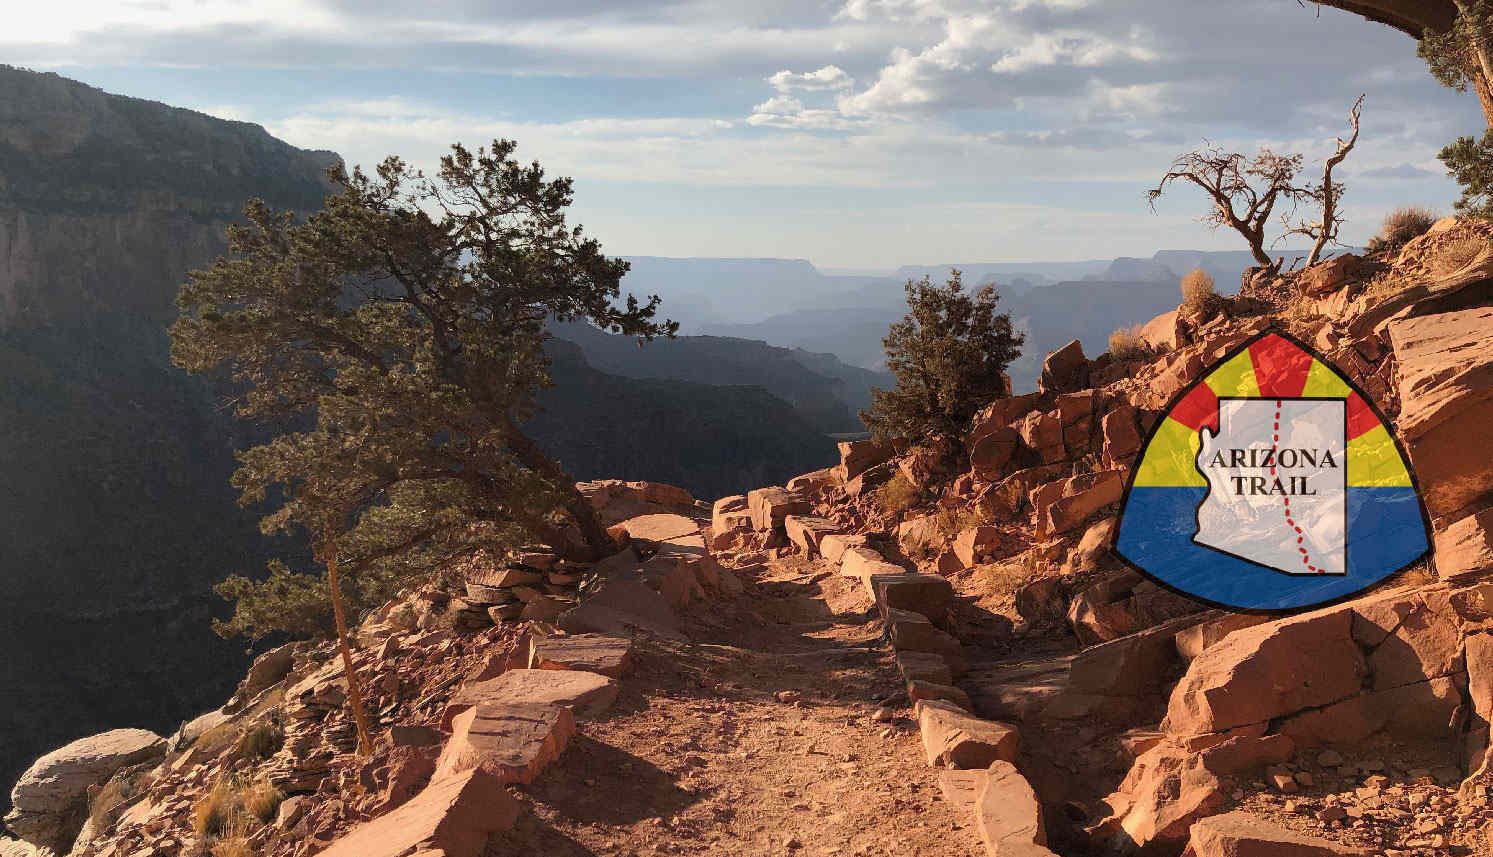
Arizona Trail Planning Guide | 7 Steps to Prepare Your Arizona Trail

Planning your Arizona Trail ride? Start here with our comprehensive Arizona Trail Planning Guide! Whether you’re preparing for the AZT300, AZT800, or a personalized tour, this guide simplifies the process, breaking down everything you need to know. The Arizona Trail Planning Guide was created to help you navigate the complexities of long-distance bikepacking with ease.

From selecting the right gear to organizing transportation and resupply strategies, this Arizona Trail Planning Guide answers your essential questions and walks you through seven key steps to prepare effectively. While this is a great starting point, remember to dive deeper into your own research for the best trail experience.

Proper planning is crucial for a successful ride on the Arizona Trail. With the right information, you’ll have more options on the trail and fewer unexpected challenges. Whether it’s finding water, food, or lodging, preparation makes all the difference. Ready to begin? Let’s plan your unforgettable journey on the AZT!

As an affiliate partner, One of Seven Project earns a commission for purchases made through any product, brand logo links, or banner ads on this page. Thanks for your support!

Save big and support The Project at the same time! Check out our Affiliate Deals page for exclusive offers on top brands. Every purchase fuels our mission to provide you with the best guides and resources for your adventures. Bookmark it now and shop smarter—deals update regularly!

STEP 1: AZT300/800 OR TOUR

Arizona Trail Planning Guide: Should You Race or Tour?

Deciding whether to race or tour the Tour Divide is a crucial first step in your preparation. Furthermore, this Arizona Trail Planning Guide provides insights into both approaches to help you make an informed decision.

Racing Pros:

  • Challenge and Achievement: Racing the AZTR is a significant personal challenge, pushing your physical and mental limits. Completing the race offers a profound sense of accomplishment.
  • Community and Camaraderie: Racing alongside others fosters a strong sense of community, with opportunities to bond over shared experiences, both during and after the event.
  • Adventure and Excitement: The race’s competitive nature and tight schedule add a level of excitement, making the experience intense and exhilarating.
  • Minimal Gear: Racing requires a lightweight setup, which can mean less gear to carry and quicker progress through the trail.
  • Defined Schedule: With the race, you have a clear start and finish, which can help with planning and motivation.

Racing Cons:

  • Pace and Pressure: The fast pace and constant pressure to keep moving can be exhausting, leaving little time to enjoy the scenery or rest.
  • Physical Strain: Racing can push your body to its limits, increasing the risk of injury, burnout, or missing the full experience of the trail due to exhaustion.
  • Less Flexibility: The tight schedule leaves little room for flexibility, detours, or taking time to explore interesting areas off the main route.
  • Limited Enjoyment: The focus on speed can detract from the overall enjoyment of the trail and its natural beauty.
  • Logistics: Coordinating logistics like resupply, transportation, and gear for a race can be more challenging due to the time constraints.

Touring Pros:

  • Flexible Schedule: Touring allows for a more relaxed pace, giving you the freedom to take breaks, explore side trails, and fully absorb the landscape and surroundings.
  • Greater Enjoyment: With less pressure to maintain a fast pace, you can enjoy the scenery, wildlife, and solitude of the trail at your own pace.
  • More Comfort: Touring allows for a more comfortable setup, with the option to carry extra gear, food, and even luxuries like a more substantial shelter or cooking equipment.
  • Less Stress: Without the pressures of racing, touring can be less stressful, making the experience more enjoyable and sustainable over a longer period.
  • Cultural and Historical Exploration: Touring provides the time to explore cultural, historical, and natural points of interest along the route, deepening your connection with the trail.

Touring Cons:

  • Longer Time Commitment: Touring the AZT takes more time, which could be a challenge if you have limited time off work or other commitments.
  • Heavier Gear Load: With more time and less need for speed, you might carry more gear, which can slow you down and make certain sections more challenging.
  • Less Community: You may encounter fewer people on the trail, especially if you’re touring during off-peak times, which can lead to a more solitary experience.
  • Weather Variability: Spending more time on the trail increases your exposure to changing weather conditions, which could impact your trip.
  • Logistics: While touring allows for a more flexible approach, it also requires more planning to manage longer resupply intervals and potential campsite selections.

Both racing and touring the Arizona Trail offer unique and rewarding experiences. Your choice depends on your personal goals, physical fitness, available time, and whether you’re seeking a competitive challenge or a more relaxed adventure. Whether you choose to race or tour, thorough planning and preparation are essential for a successful and enjoyable journey.

Stay Safe & Connected on Your Bikepacking Journey:

Planning for emergencies means having the right communication tools. For added peace of mind, consider setting up a Spot Tracker for your international bikepacking journey. Check out our Spot Tracker Setup Guide to make sure you’re prepared for any situation, even in remote areas.

STEP 2: PICK A DATE

Arizona Trail Planning Guide: Choose Your Best Start Date

Choosing the right start date for your Arizona Trail adventure is more than just marking a day on the calendar; instead, it’s about aligning with weather conditions and your goals. Don’t forget to consider Arizona Trail Transportation Guide tips for logistical support.

While the third Thursday of October marks the official Grand Depart for racers, those planning to tour have a broader window of opportunity. Therefore, understanding weather patterns and your personal preferences is essential to ensure a safe and enjoyable journey.

AZT300/800


The official starts: of the AZTR takes place on the third Thursday of October each year.

  • AZT800: 7:00 AM at the Mexican Border / Monument 103 – NEW START DATE Oct. 1st.
  • AZT300: 6:00 AM at the Mexican Border / Monument 103 – third Thursday of October each year.

Always check the official event page to be sure (Times and dates have moved before).

TOUR


If you’re seeking more flexibility, touring the AZT might be the better option. The ideal times for a thru-bike of the Arizona Trail are in the spring and fall. Summer temperatures can be dangerously high, making it unsafe to attempt the route. Winter brings snow to the higher ridges and peaks, rendering parts of the trail impassable. Planning your ride for the spring or fall will provide a safer and more enjoyable experience.

Pro-Tip

If you choose to the AZT300/800 in the Fall, be aware that the trail will be more overgrown than the Spring. The Cats Claw in the south is a bitch. Over half the distance from the 300 start to Patagonia is choked in tall grass, making following the trail extremely hard.

STEP 3: WHICH DIRECTION TO GO?

Arizona Trail Planning Guide: Decide Between Northbound or Southbound

Deciding which direction to go primarily applies to those touring the Arizona Trail. The race only tracks NOBO times, so if you’re racing, NOBO is your only option. However, if you’re planning to tour, you have the flexibility to choose between NOBO or SOBO. The pros and cons below are tailored to help those touring the route make the best decision for their journey.

NOBO (Mexico to Utah):

Pros:

  • Familiar Start Point: Starting at the Mexican border, a common launch point for both the AZT300 and AZT800, provides a sense of tradition and camaraderie, as most riders begin here.
  • Gradual Acclimation: The trail begins in the low desert, allowing you to gradually acclimate to higher elevations as you head north, particularly if you’re starting in the spring.
  • Increasingly Scenic Terrain: As you move north, the scenery becomes more varied and dramatic, with the northern sections offering stunning views of the Grand Canyon and surrounding landscapes.
  • Longer Riding Season: Starting in the south in spring can give you more time to complete the route before winter conditions set in at higher elevations.

Cons:

  • Heat in the Early Sections: Spring start dates can mean dealing with high temperatures in the southern desert sections, which can be physically draining and challenging.
  • Tougher Finish: The northern sections of the trail are more remote and rugged, making the final stages of the ride particularly challenging as fatigue sets in.
  • Snow in the North: If you start too early in the season, you may encounter lingering snow in the higher elevations of the northern sections, especially around the San Francisco Peaks and the Kaibab Plateau.

SOBO (Utah to Mexico):

Pros:

  • Cooler Start: Starting in the north during fall typically means cooler temperatures, allowing you to avoid the summer heat and begin your journey in more comfortable conditions.
  • Avoiding Early Snow: Starting later in the year can help you avoid lingering snow in the high northern sections, as the snow tends to melt by late summer or early fall.
  • Easier Finish: Finishing in the lower elevation desert areas can make the final stages of the ride easier, especially as you may be fatigued by the end of the trail.

Cons:

  • Shorter Riding Season: Starting in the north in the fall gives you less time to complete the route before winter conditions set in, particularly in the higher elevations of the southern sections.
  • Challenging Start: The northern sections are more remote and challenging, which can be tough to tackle at the beginning of your journey when you’re still finding your rhythm.
  • Heat in the South: As you approach the southern end of the trail, you may encounter warmer temperatures, especially if your trip extends into late fall. This can be physically demanding after the accumulated fatigue of the earlier sections.

Both NOBO and SOBO have their unique challenges and benefits, so your choice should depend on your preferred conditions, timing, and the type of experience you’re looking for on the Arizona Trail.

ARIZONA TRAIL RACE PLANNING AIDS

Welcome to The Project’s Arizona Trail Planning Aids, designed to bridge the gap left by the lack of high-quality planning tools within bikepacking. As a Triple Crown thru-hiker, I’m accustomed to comprehensive planning resources, and I noticed that bikepacking needed similar quality tools. That’s why I developed these resources to make your Arizona Trail adventure as smooth and well-prepared as possible.
Our planning aids include four distinct styles to help you plan your ride:

  • The Data Sheet: Offers the most detailed information, including distance, elevation +/-, resupply options, notes and more for key POI.
  • Town List: provides cumulative distances between POI, and does the math so you don’t have to.
  • Mileage Chart and Elevation Gain Chart: are simple graphs showing cumulative mileage and elevation gain between POI.

Additional Resources

  • Why Use Our Planning Aids: Check out the “Why Choose Our Planning Aids” tab below for an in-depth explanation of their value, including how they simplify preparation, save time, and provide clarity bikepacking adventures and racing.
  • Tour Divide Maps: Explore our companion Ride with GPS maps section below, to visualize the route, identify POIs, and download files for offline navigation.

Explore our offerings to find the perfect combination for your needs and get ready to conquer the Arizona Trail Race! Don’t forget to checkout our online Arizona Trail Resources as well.

BUNDLES

Small Bundles:

Big Bundles:

The Small Bundle includes our two most popular planning aids, giving bikepackers essential route data in a streamlined format. With key logistics, cumulative mileage, and resupply details at your fingertips, this bundle simplifies planning and keeps you focused on the ride.

  • Data Sheet – The most comprehensive planning tool, packed with mileage, elevation gain/loss, resupply points, and key logistics.
  • Town List – Cumulative mileage and elevation gain between POIs, helping track progress and plan stops efficiently.

The Big Bundle provides the most complete set of planning tools, ensuring you have everything needed to plan effectively and ride with confidence.

  • Data Sheet – Detailed mileage, elevation, and resupply information for comprehensive planning.
  • Town List – Cumulative distance and elevation tracking for easy route management.
  • Mileage Chart – Quick-reference breakdown of distances between key points.
  • Elevation Gain Chart – Clear elevation changes to help anticipate climbs and descents.

Available in NOBO and US Standard units ONLY.

Small Bundle – $40.00  *You save $10 when you bundle!

Big Bundle – $60.00  *You save $20 when you bundle!

Craig, I wanted to let you know that your bikepacking guides are incredibly well done and useful.

“Thanks again for a great guide.  I’m have been using it as I prepare for the AZT750 this year.”

“I’m a cartographer at ACA and really wanted to tell you how great it is that you made this guide for prospective riders on TD.”

“I’m reaching out to thank you for the work you’ve put into One of Seven Project. It’s been an incredible resource for me as I transition from supported to unsupported tours and bikepacking.”

DATA SHEETS / TOWN LISTS

Data Sheets:

Town Lists:

The Data Sheet is our most comprehensive planning tool, packed with detailed route data, including mileage, elevation gain/loss, resupply points, key logistics, and more to support every aspect of your ride. Designed to be the ultimate resupply tool, it ensures bikepackers have the critical information needed to plan their route efficiently and make informed decisions on the go.

  • Key POI.
  • Elevation / Pop of POI.
  • Mileage numbers.
  • Distance to next.
  • Elevation +/-.
  • Max & Min. elevation between POI.
  • Pavement sections.
  • Key water sources.
  • Shows bike shops.
  • Resupply options.
  • Important notes.
  • Elevation profile.
  • Finish Target Times.

The Town List provides cumulative distances and elevation gain between multiple POIs, helping bikepackers track progress and plan resupply stops with ease. By doing the math for you, it saves time and lets you focus on the ride.

  • Key POI.
  • Mileage.
  • Distance on/off trail.
  • Important notes about POI.
  • Cumulative distances to up coming POI.
  • Elevation Gain to reach up coming POI.
  • Key water sources.
  • Shows bike shops.
  • Finish Target Times added.

Available in NOBO and US Standard units ONLY.

Data Sheet – $25

Town List (ONLY available as part of the Small or Big Bundle.)

Craig, I wanted to let you know that your bikepacking guides are incredibly well done and useful.

“Thanks again for a great guide.  I’m have been using it as I prepare for the AZT750 this year.”

“I’m a cartographer at ACA and really wanted to tell you how great it is that you made this guide for prospective riders on TD.”

“I’m reaching out to thank you for the work you’ve put into One of Seven Project. It’s been an incredible resource for me as I transition from supported to unsupported tours and bikepacking.”

MILEAGE / ELEVATION GAIN CHARTS

Mileage Charts:

Elevation Gain Charts:

The Mileage Chart provides a quick-reference breakdown of distances between key points along the route, helping bikepackers plan resupply stops and daily targets efficiently.

  • Shows bike shops.
  • Works for both directions.
  • Key water sources.

The Elevation Gain Chart delivers a clear view of total elevation changes, allowing riders to anticipate climbs, descents, and overall route difficulty at a glance.

    • Shows bike shops.
    • Works for both directions.
    • Key water sources.

Available in NOBO and US Standard units ONLY.

Mileage and Elevation Gain Carts are our available as part of the Big Bundle.

Big Bundle – $60.00  *You save $20 when you bundle!

Craig, I wanted to let you know that your bikepacking guides are incredibly well done and useful.

“Thanks again for a great guide.  I’m have been using it as I prepare for the AZT750 this year.”

“I’m a cartographer at ACA and really wanted to tell you how great it is that you made this guide for prospective riders on TD.”

“I’m reaching out to thank you for the work you’ve put into One of Seven Project. It’s been an incredible resource for me as I transition from supported to unsupported tours and bikepacking.”

What Are Planning Aids?

Arizona Trail Planning Aids

Our Arizona Trail Planning Aids are comprehensive resources designed to assist bikepackers in effectively planning and navigating their adventures. Whether you’re tackling challenging bikepacking routes, or exploring scenic trails, these aids deliver critical route data and information to simplify your preparation and keep you focused on your journey.

From mileage data to key resupply points and water sources, our Arizona Trail Planning Aids provide the essential details to help you stay on track and fully experience the trail. We aim to support your success, no matter how you choose to explore the outdoors.

Why Use Our Planning Aids?

Arizona Trail Planning Aids

Our Arizona Trail Planning Aids for bikepacking are trusted by experienced bikepackers, and endurance riders, because they simplify preparation and provide clarity where it matters most. With our Arizona Trail Planning Aids, you can:

  • Plan with Confidence: Know exactly what’s ahead, from water stops to elevation changes.
  • Save Time: Get all the key route details in one organized place—no more piecing together scattered info.
  • Stay Focused on the Journey: With your prep done, you’ll spend less time worrying and more time enjoying the experience.

What You Get

Arizona Trail Planning Aids

When you choose our Arizona Trail Planning Aids, you gain access to reliable and organized route-specific data, including:

  • Point-of-Interest (POI) Data:
    • Mileage markers, cumulative distances, and key stops along the route.
    • Locations for resupply points, water sources, bike shops, and other critical services.
  • Route Metrics:
    • Elevation gain/loss, max/min elevations, and pavement mileage.
    • Detailed charts to help you anticipate climbs, descents, and varying terrain.
  • Practical Notes for Riders:
    • Guidance for navigating remote areas, staying prepared for dry stretches, and hitting resupply points.
    • Finish targets and other planning details to set achievable goals for each ride.
  • Convenient Formats:
    • Delivered as easy-to-use PDF files, available in both SOBO (Southbound) and NOBO (Northbound) formats where applicable.
  • Free Updates Throughout the Year:
    • Planning Aids include the most current data available at the time of purchase and are valid through December 31 of that year. If new information becomes available, you’ll receive free updates via email to ensure you’re always using the latest data.

Craig, I wanted to let you know that your bikepacking guides are incredibly well done and useful.

“Thanks again for a great guide.  I’m have been using it as I prepare for the AZT750 this year.”

“I’m a cartographer at ACA and really wanted to tell you how great it is that you made this guide for prospective riders on TD.”

“I’m reaching out to thank you for the work you’ve put into One of Seven Project. It’s been an incredible resource for me as I transition from supported to unsupported tours and bikepacking.”

Arizona Trail Race Maps

Ride with GPS Maps

Plan Smarter with our Arizona Trail Maps and Planning Aids

The Arizona Trail Race is one of the most challenging bikepacking routes in the world, stretching thousands of miles through remote terrain and breathtaking landscapes. Proper preparation is essential for success, and these interactive maps, based on the official race route, are designed to complement the One of Seven Project’s Arizona Trail Planning Aids, giving you a powerful combination of tools to streamline your planning process.

  • Route visualization: Use the maps to explore the route, identify Points of Interest (POIs), and understand the trail’s layout. Icons represent water sources, resupply points, towns, and bike shops, offering a high-level view of critical stops along the way.
  • Downloadable backup: By downloading these maps from Ride with GPS, you’ll have a reliable backup GPX file to use if your GPS device runs out of battery or breaks.
  • Detailed insights: Dive deeper into the Planning Aids for essential data like mileage, elevation gain/loss, resupply strategies, and water details—organized to help you tackle the unique challenges of the Arizona Trail Race with confidence.

Together, these resources provide everything you need to map out a realistic strategy for tackling the Tour Divide, whether you’re racing or touring. Start planning your adventure today!

As an affiliate partner, One of Seven Project earns a commission for purchases made through any product, brand logo links, or banner ads on this page. Thanks for your support!

STEP 4: SETTING UP A RESUPPLY / ITINERARY SCHEDULE

Arizona Trail Planning Guide: Plan Your Food and Water Resupplies

Racing

Even when racing, it’s crucial to have a general plan for where you want to be and how long it should take to get there. Consider creating a chart or PDF that outlines resupply spots along the route, including mileages, hours of operation, and distances between them. Include your target arrival times at each spot based on your intended finish time, and plan for a range of days to account for variations in conditions or your own performance. Keeping this information on your phone will ensure it’s easily accessible when you need it.

If creating this plan sounds too time-consuming, you can always purchase one of The Project’s Planning Aids for a ready-made solution.
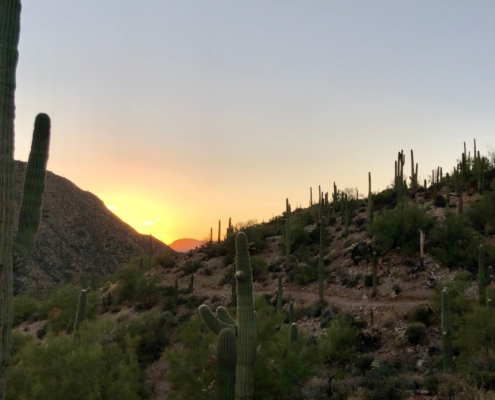
Touring

Like racing, having a flexible plan for where and when you want to be at specific locations is highly beneficial when touring. Understanding your resupply options, distances between food and water sources, and the key spots you want to visit will make your trip smoother and more enjoyable.

Take note of any particular locations you definitely want to stop at, or any side trips you might want to take. Don’t forget to factor in travel time to and from the trailhead. If you’re touring, consider planning a zero day for rest and recovery to fully enjoy the experience.

Pro-Tip

A big part of setting up an Itinerary is knowing what’s available and how difficult something is. The Passages pages on the ATA website are full of useful information. Going through them could be beneficial.

Whether you’re racing or touring the AZTR, having a basic itinerary is beneficial. While you don’t need to follow it rigidly, creating one helps you become familiar with the route and keeps you focused on your goals.

For more details on building an itinerary, check out the “Bikepacking: Pre-Trip Considerations” post. It covers a wide range of topics, including planning, gear, health and personal considerations, and managing electronics.

The Arizona Trail Association and AZT300-800.com are excellent reference points.

To the right, you’ll find an example itinerary, with a link to make a copy. This link also provides access to Gear Lists, a Planning Checklist, a Mail Drop Sheet, and a Food Planner.

The spreed sheets above are available on Google Docs, Please go to “Edit”, then select, ” Copy”. When pasting use Control(Command) – Shift – Paste or it won’t work. You’ll have to adjust column sizes. Then make all the changes you like! Happy planning and trails.

STEP 5: GEAR

Arizona Trail Planning Guide: Pack Smart for Your Ride

Packing the right gear is essential for success on the Arizona Trail. The diverse terrain—from desert heat to high plateaus—demands reliable, versatile equipment, and those tackling the AZT800 will need additional cold-weather gear for the Mogollon Rim. Gear mishaps can be costly, so create a detailed gear list and review it carefully.

Testing your setup during training rides is equally important. By doing so, you’ll identify what works, minimize surprises, and gain confidence for the trail. For additional insights, check out our links below to learn from past experiences and refine your own setup.

AZT Gear Resources

My Proven Triple Crown Bikepacking Gear: A detailed gear list of what I used during my AZT.

If I Rode the AZT Again: A deep dive into what worked and what I would bring if I did the AZT again.

Rider Survey Results: Look and see what other riders have used on the AZT.

Once you’ve selected your gear, test it thoroughly. Replace any items that didn’t work well, and test your setup again. It’s much easier to make adjustments at home than on the trail. Remember, thorough testing is key—conduct a proper Shakedown Ride to ensure everything functions as expected.

Arizona Trail Race Rider Survey

The Project conducts an ongoing rider survey to assist new riders in selecting the right gear for the Arizona Trail Race. Embarking on an adventure like the AZTR can be daunting, and the planning process overwhelming. We hope this survey will aid new riders in their preparation and execution of their Arizona Trail ride, ensuring they are better equipped for their adventure.

If you haven’t taken the Arizona Trail Race Rider Survey yet, we encourage you to participate through the links below.

***Please pay close attention to the examples provided for questions requiring typed answers. If responses are not entered exactly as shown in the examples, I will need to correct them, which can skew the results. Thank you in advance!

Covers: bikes, suspension, tires & wheels, drivetrain, and Components.

Covers: navigation planning, camping, logistic/travel, clothes, and more.

STEP 6: TRAINING

Arizona Trail Planning Guide: Train for Endurance and Success

Training for the Arizona Trail demands more than just physical conditioning—it requires mental toughness, strategic preparation, and a deep understanding of the terrain. Whether you’re racing or touring the AZT, focusing on endurance, strength, and resilience will prepare you for the diverse challenges ahead.

As the saying goes, “The mind controls the body,” and on a demanding route like the AZT, mental resilience is just as critical as physical fitness. Every rider’s approach to training is unique, so use the list below as a starting point, drawn from personal experiences to help you prepare effectively.

Here’s how to get ready:

Build Endurance

  • Long Rides: Incorporate long-distance rides into your training routine. Gradually increase your mileage to mimic the distances you’ll cover on the AZTR.
  • Back-to-Back Days: Train on consecutive days to simulate the fatigue you’ll experience during the race. This helps your body adapt to riding while tired.

Focus on Climbing

  • Hill Repeats: Include regular hill training sessions to build strength and endurance for the trail’s demanding climbs. Mix up the terrain by practicing on both short, steep inclines and longer, gradual climbs.
  • Load-Bearing Training: Ride with a fully loaded bikepacking setup during your hill sessions. This will prepare you for the added weight you’ll carry on the trail.

Simulate Trail Conditions

  • Technical Skills: The AZTR features rugged, technical sections, so practice riding on similar terrain. Focus on improving your skills in rocky, uneven, and loose conditions.
  • Shakedown Rides: Conduct multiple Shakedown Rides on terrain similar to the AZT to test your gear and fitness. These rides also help you practice managing nutrition and hydration.

Strength Training

  • Core and Upper Body: Include strength training exercises that target your core and upper body. A strong core helps with balance and control, while a strong upper body is crucial for handling the bike over technical terrain.
  • Leg Strength: Focus on exercises like squats, lunges, and deadlifts to build leg strength for sustained climbing and endurance.

Mental Preparation

  • Visualization: Visualize yourself riding through challenging sections of the AZTR. Mental preparation is key to handling the inevitable tough moments during the race.
  • Push Your Limits: During training, occasionally push yourself beyond your comfort zone to build mental resilience. This can be through longer rides, tougher conditions, or faster paces.

Nutrition and Hydration

  • Dial in Your Nutrition: Experiment with different types of food and hydration strategies during training. Find out what works best for your body during long rides, especially in hot, arid conditions similar to the AZT where electrolytes are needed.
  • Practice Eating on the Bike: Get comfortable with eating while riding to maintain energy levels without stopping.

Acclimate to Heat and Altitude

  • Heat Training: If possible, train in hot conditions to prepare your body for the desert sections of the AZTR. Gradually increase your exposure to heat to build tolerance.
  • Altitude Training: Spend time riding at higher elevations if you live in or can access mountainous areas. This will help your body adjust to the altitudes you’ll encounter on the AZT.

Dial in Your Hike-a-Bike (HAB) Setup

  • Practice Carrying Your Bike: The Grand Canyon section requires you to carry your bike, so dial in your HAB setup and practice carrying your bike during training. This will prepare you for the physical and logistical challenges of this section.

Recovery and Rest

  • Prioritize Recovery: Include rest days in your training plan and pay attention to your body’s signals. Adequate recovery is essential for preventing injury and ensuring consistent progress.
  • Sleep: Aim for quality sleep, especially leading up to the race, to ensure your body is fully rested and ready.

By focusing on these training aspects, you’ll be well-prepared for the physical and mental demands of the AZTR, setting yourself up for success on the trail.

STEP 7: DO A SHAKEDOWN RIDE

Arizona Trail Planning Guide: Test Everything Before You Start

A thorough Shakedown Ride is essential for a successful Arizona Trail experience. Use training rides to test your loaded bike setup, food, and water plans. This hands-on approach helps you uncover potential issues, refine your gear choices, and build confidence before the start line.

Testing your setup goes beyond packing and checking tightness—it’s about understanding how your bike handles under load, identifying any rattles or rubs, and discovering what doesn’t work. An untested setup can lead to unnecessary stress during your race or tour, so invest time in this critical step.

Here’s how to test your setup effectively:

  • Iterate and Adjust: Perfection doesn’t come on the first try. Experiment with different configurations to find what works best for you.
  • Balance Your Load: Ensure your gear is evenly distributed to maintain stability and control.
  • Address Uncertainties: If you’re unsure whether a component or setup will work, resolve these doubts before heading out.
  • Test Electronics: Thoroughly check your GPS and other electronics to ensure they function reliably. Know how to trouble shoot issues that might arise.
  • Secure Bottles: Bottles mounted on forks and down tubes are prone to falling off and rubbing. Verify that they’re securely attached to avoid losing essential water-carrying capacity.

By thoroughly testing and refining your setup, you’ll be better prepared for the challenges ahead.

More Helpful AZT Resources

Read these next.

Arizona Trail Planning Aids: Resupply, Mileage, and More

Checkout our full line of AZTR Planning Aids at our store. Only available in NOBO US standard units.

Arizona Trail: My Prove Triple Crown Bikepacking Gear

  • Ultimate Bikepacking and Hiking Resource

A detailed look at what I used on my AZT (ITT), what worked and what didn’t.

Arizona Trail Gear: What Worked Well and What’s Even Better

  • Slider for Arizona Trail Gear guide for bikepacking the AZTR—what worked and what I'd use next time

In depth look at what I would bring for gear and why, if I rode the AZT again.

Arizona Trail Rider Survey: Essential Gear Insights for New Riders

Curios to know what gear other riders used to get to the finish line? Checkout our Rider Surveys to find out what works or to take the survey yourself.

Ultimate Arizona Trail Guide:

Route, Resources, and More


Arizona Trail Resource Cover Photo

Checkout our bikepacking resource page for more planning help.