As an affiliate partner, One of Seven Project earns a commission for purchases made through any product, brand logo links, or banner ads on this page. Thanks for your support!

For more information on the Tour Divide visit our TD Resource page. »
Unlike most routes the Tour Divide presents the added challenge of crossing international borders. Luckily for you many have paved the way for you. They’ve found all the hiccups and pitfalls of figuring out getting to and from the Tour Divide (GDMBR).
In an attempt to help you figure out your way I built this Tour Divide Transportation Guide covering: Passports and Visas; Which airports are best; Travel to and from the airport; Parking options, and The best options to get your bicycle to/from the trail.
Shopping with our affiliates helps fund the development of content like this.
When it comes to international travel you have some hoops to jump through depending on which country you live in and are going to. US citizens only need their passport to fly into Canada. Those from countries other than the US, need to apply and get an eTA.
Entering the United States for US residents is as easy as having a Passport Book or Passport Card. Those from one of 38 approved countries can apply for an ESTA. If you don’t live in one of those 38 approved countries you must fill out a B-1 or B-2 Visitor Visa in advance.
The jury appears to be split on on whether one needs a return flight when entering the US. Some racers had return flights and were never ask to show proof. In the end it really comes down to which border guard you get and other unknown factors, in regards to your border experience.
If you Google the question of return flights you’ll find the following in regards to using a Visa Waiver Program (VWP):
Passengers travelling to the U.S. under the VWP must have a valid ticket for a confirmed return or onward flight from the U.S. within 90 days or arrival in the U.S. , prior to entering the U.S. An onward flights to Canada, Mexico, Bermuda and/or the Caribbean is insufficient to satisfy this requirement, unless the passenger is a lawful resident of one of those countries.
Bureaucracy can mean long wait times. Don’t put off applying for any of these forms or your Passport. Your trip depends on it.

Know the difference between a Passport Book and Card, your race/tour depends on it. From my research I have found that you should plan on bringing your Passport Book. Leave your Passport Card at home, unless you plan to drive to Banff.
Passport Books are good for land, sea or air travel.
Passport Cards can only be used for land or sea travel to Canada, Mexico, Bermuda, and the Caribbean. They are not good for any international air travel or for visas.
Make sure you Passport is not within 6 months of expiring before you travel.
Entering the US for non US citizens requires a ESTA. They can take longer to get than the Canadian eTA form. Keep this in mind when applying. Also if you don’t get approved you have to then apply for a B-1 or B-2. Apply early! Rules and regulations change frequently so be prepared that the process might have changed.
Non-US citizens should consider insisting that border agents scan their passport, even if they offer to just wave them through. That way you can prove you left Canada, in case it comes up later.
For non-US citizens entering Canada, you need to apply and obtain a eTA form.
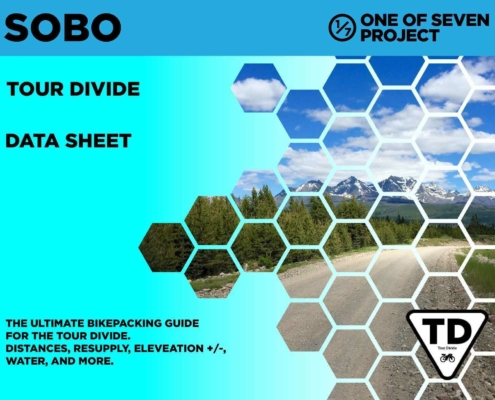
Welcome to The Project’s Planning Aids, designed to bridge the gap left by the lack of high-quality planning tools within bikepacking. As a Triple Crown thru-hiker, I’m accustomed to comprehensive planning resources, and I noticed that bikepacking needed similar quality tools. That’s why I developed these resources to make your Tour Divide adventure as smooth and well-prepared as possible.
Our planning aids include four distinct styles to help you plan your ride. The Data Sheet offers the most detailed information, including distance, elevation changes, average grade, and notes on key points between locations, along with references to ACA maps, bike shops, and resupply options. The Town List provides cumulative distances between points of interest, making it easy to see how far you are from various locations without calculating it yourself. The Mileage Chart and Elevation Gain Chart are simple graphs showing cumulative mileage and elevation gain between key points along the route. Each tool serves a unique purpose to support your planning and navigation.
Explore our offerings to find the perfect combination for your needs and get ready to conquer the Tour Divide! Don’t forget to checkout our online Tour Divide Resources as well.


One package including our two most popular planning aids:


One package with all our planning aids:
Available in both SOBO and NOBO versions and US Standard and Metric units.
Small Bundle – $40.00 + tax (CO only) *You save $10 when you bundle!
Big Bundle – $60.00 + tax (CO only) *You save $20 when you bundle!


The NOBO Data Sheets are ONLY available as part of the Small or Big Bundles.


All versions of the Town Lists are ONLY available as part of the Small or Big Bundles.
The SOBO Data Sheets are available in BOTH US Standard and Metric units.
Data Sheet – $25 + Tax (CO only)
Example of Data Sheet

Example of Town List

Differences Between the Data Sheet and Town List
The Data Sheet provides the most comprehensive information, including details on distance, elevation changes (both gain and loss), average grade, and maximum/minimum elevations. It also highlights pavement sections, references ACA maps, and lists bike shops and resupply options. Additionally, it includes key notes on the segments between two points of interest (e.g., from A to B, then B to C).
In contrast, the Town List focuses on cumulative distances between points of interest, helping you quickly determine how far you are from various locations without needing to calculate it yourself. It includes distance, elevation changes, resupply options, bike shops, and key notes for each segment.


Quickly find the total mileage between any two POI along the route.


Quickly find the total elevation gain between any two POI along the route.
The Mileage and Elevation Gain Charts are ONLY available as part of the Big Bundle.


GDMBR Data Sheets have all the same data categories as the Tour Divide planning aids, as seen in the examples above but are for the GDMBR from the ACA.


GDMBR Bundles have all the same data categories as the Tour Divide planning aids, as seen in the examples above but are for the GDMBR from the ACA.
Available in both SOBO and NOBO versions and in US Standard and Metric units.
Data Sheet – $25 + tax (CO only)
Small Bundle – $40.00 + tax (CO only) *You save $10 when you bundle!
Big Bundle – $60.00 + tax (CO only) *You save $20 when you bundle!

The airport of choice to fly into for a start in Banff would be (YYC) Calgary International Airport in Calgary, AB. It offers many options when it comes to airlines and is easy to navigate.
When you finish, you have a couple of options. The closest is El Paso International Airport in Texas, at just under 3 hours. The furthest is Albuquerque International Airport in New Mexico, at around 5 hours.
If by chance you happen to fly one way to either the start or home from the finish as I did, keep in mind that depending on which airline you choose, your bike could cost more to fly than you. Choose wisely!
Being that YYC is an international airport, you’ll have lots of options of which airline you use. The full list includes:
Flying into YYC, your transportation to the northern terminus will look something like this.
Option 1 – Schedule a seat on the Banff Airporter (see below for details).
Option 2 – Ride to start, 89 miles (143 km) 7:36. NOTE: this route is mostly on Highway 1.
El Paso International Airport (ELP) is your closest airport to the southern terminus. It’s only 176 miles and 2 hours 53 minutes.
Tucson International Airport (TUS) is your second closest airport to Antelope Wells. It’s 242 miles and 3 hours and 38 minutes drive time. It’s a smaller airport when it comes to international airports, which means it’s easy to get around.
Albuquerque International Airport (ABQ) is your furtherest option from the finish. It’s 328 miles and 4 hours and 58 minutes drive time.

The Project conducts an ongoing rider survey to assist new riders in selecting the right gear for the Tour Divide. Embarking on an adventure like the Tour Divide can be daunting, and the planning process overwhelming. We hope this survey will aid new riders in their preparation and execution of their Tour Divide ride, ensuring they are better equipped for their adventure.

Covers: bikes, suspension, tires & wheels, drivetrain, and Components.
Covers: navigation planning, camping, logistic/travel, clothes, and more.
Parking at either of the Tour’s terminuses really isn’t needed as most riders don’t drive themselves to the start. With that said there is a parking lot for the Spray River Trail in Banff, where one could park to wait for riders to finish. In New Mexico at the Antelope Wells Port of Entry there is a dirt area on the right, where one can park and wait for riders.
The Town of Banff has a 72 hour rule for parked cars. There is no mention of long term parking on their website. or anywhere else on the web.
Almost everyone has to fly to get to the Tour Divide. This means boxing up your bike for flying or shipping it to the start. You can ship your bike to Canada but the potential for it to get stuck in customs is not worth the risk. It is a much better idea to fly with your bike.
Airlines charge between $50 and $150 (some international airlines are free). They also require you keep the combine size (length plus width plus height) of your bike box at 62 or less inches, or additional charges may apply.
Similar to planning your resupply and water resources, it pays to do your homework when flying. You can dig up “hacks” on the internet for avoiding to pay for traveling with your bike. With all the airlines out there, I’ll leave it up to you to do that research yourself.
Shipping your bike means flexibility. Here are the three most common options:
Whether you’re flying or just shipping your bike be sure to remove your Co2 cartridges.
Also don’t bother fully taping up your box as TSA will most definitely go through it with you before they accept it.
Your Divide starts and ends with a place to stay. The start has more options but also more people attempting to get those options. The finish has few options but there are also less people and their arrival is spread out. This makes it easier.
BANFF
Banff YMCA – the unofficial base camp has rooms but reserve your’s early as space is limited and rooms go fast. Also be aware it can be noisy.
There are many other lodging offerings available in Banff. Here are the Google results for them.
JASPER (Tour Divide Max)
There are many other lodging offerings available in Banff. Here are the Google results for them. You can find camping options as well.
ANTELOPE WELLS
The Bike Ranch – Jeffery Sharp is located a half mile from Hachita and offers a couple guest rooms, one with its own shower and toilet. Food, beverages, internet, laundry, kitchen, dish tv, tools, used tires, tubes, etc.
He also is working on converting an office trailer with water that is on the property. Includes a toilet. Very Private and quiet.
The Hachita community center is still be available. It has changed from a donations format to $10 per person. Outdoor camping is free. There is a bathroom and kitchen. Big water spigot for public use in front of building. Lots of space for large groups.
Everything you need to plan a bikepacking trip on the Tour Divide.
 https://oneofsevenproject.com/wp-content/uploads/2023/12/rsz_2024_td_sb_ds_10.jpg
1275
1650
Craig Fowler
http://oneofsevenproject.com/wp-content/uploads/2017/01/1of7-logo-lockup-grey-1132x212-300x56.png
Craig Fowler2020-03-06 19:10:242024-07-26 11:13:22Ultimate Tour Divide Planning Aids: Resupply, Mileage, and More
https://oneofsevenproject.com/wp-content/uploads/2023/12/rsz_2024_td_sb_ds_10.jpg
1275
1650
Craig Fowler
http://oneofsevenproject.com/wp-content/uploads/2017/01/1of7-logo-lockup-grey-1132x212-300x56.png
Craig Fowler2020-03-06 19:10:242024-07-26 11:13:22Ultimate Tour Divide Planning Aids: Resupply, Mileage, and More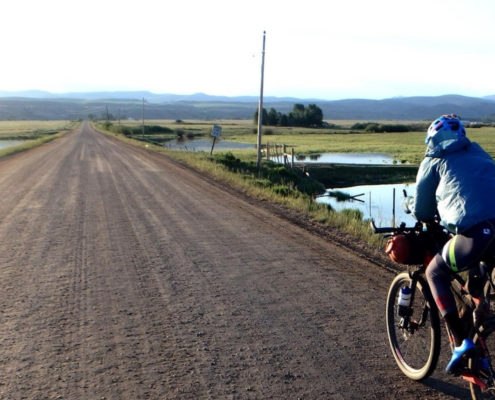 https://oneofsevenproject.com/wp-content/uploads/2018/11/Untitled-design-9.jpg
857
1493
Craig Fowler
http://oneofsevenproject.com/wp-content/uploads/2017/01/1of7-logo-lockup-grey-1132x212-300x56.png
Craig Fowler2020-03-06 13:25:442024-07-25 13:34:21Tour Divide Gear: What Worked Well and What’s Even Better
https://oneofsevenproject.com/wp-content/uploads/2018/11/Untitled-design-9.jpg
857
1493
Craig Fowler
http://oneofsevenproject.com/wp-content/uploads/2017/01/1of7-logo-lockup-grey-1132x212-300x56.png
Craig Fowler2020-03-06 13:25:442024-07-25 13:34:21Tour Divide Gear: What Worked Well and What’s Even Better https://oneofsevenproject.com/wp-content/uploads/2018/02/alaska-mountains-haulroad-bikepacking.jpg
857
1493
Craig Fowler
http://oneofsevenproject.com/wp-content/uploads/2017/01/1of7-logo-lockup-grey-1132x212-300x56.png
Craig Fowler2019-06-10 15:11:072024-07-26 11:12:25Tour Divide Made Easy: Essential Step-by-Step Planning Guide
https://oneofsevenproject.com/wp-content/uploads/2018/02/alaska-mountains-haulroad-bikepacking.jpg
857
1493
Craig Fowler
http://oneofsevenproject.com/wp-content/uploads/2017/01/1of7-logo-lockup-grey-1132x212-300x56.png
Craig Fowler2019-06-10 15:11:072024-07-26 11:12:25Tour Divide Made Easy: Essential Step-by-Step Planning Guide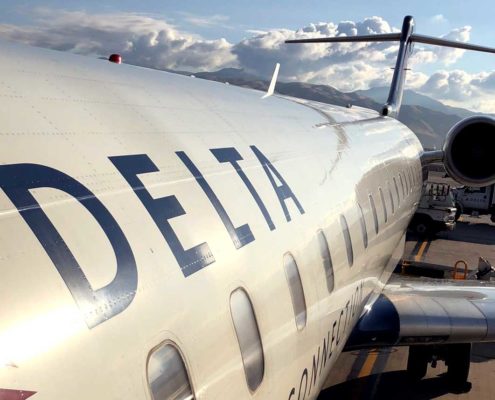 https://oneofsevenproject.com/wp-content/uploads/2018/01/transportation-flying-1.jpg
857
1493
Craig Fowler
http://oneofsevenproject.com/wp-content/uploads/2017/01/1of7-logo-lockup-grey-1132x212-300x56.png
Craig Fowler2019-06-09 22:32:502024-07-26 11:26:20Your Ultimate Tour Divide Transportation Guide: Passports, Airports, And More
https://oneofsevenproject.com/wp-content/uploads/2018/01/transportation-flying-1.jpg
857
1493
Craig Fowler
http://oneofsevenproject.com/wp-content/uploads/2017/01/1of7-logo-lockup-grey-1132x212-300x56.png
Craig Fowler2019-06-09 22:32:502024-07-26 11:26:20Your Ultimate Tour Divide Transportation Guide: Passports, Airports, And More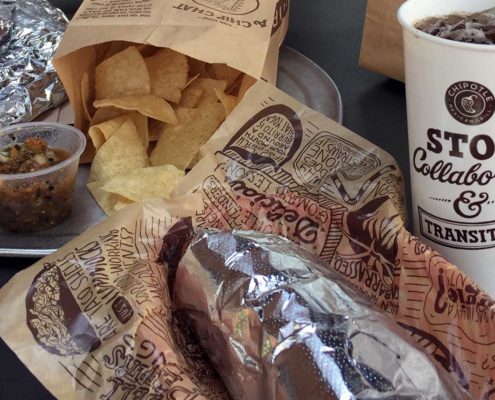 https://oneofsevenproject.com/wp-content/uploads/2018/03/tourdivide-resupply-oneofsevenproject.jpg
857
1493
Craig Fowler
http://oneofsevenproject.com/wp-content/uploads/2017/01/1of7-logo-lockup-grey-1132x212-300x56.png
Craig Fowler2019-06-08 20:25:412024-07-26 11:33:20Ultimate Resupply Strategy for an Epic Tour Divide
https://oneofsevenproject.com/wp-content/uploads/2018/03/tourdivide-resupply-oneofsevenproject.jpg
857
1493
Craig Fowler
http://oneofsevenproject.com/wp-content/uploads/2017/01/1of7-logo-lockup-grey-1132x212-300x56.png
Craig Fowler2019-06-08 20:25:412024-07-26 11:33:20Ultimate Resupply Strategy for an Epic Tour Divide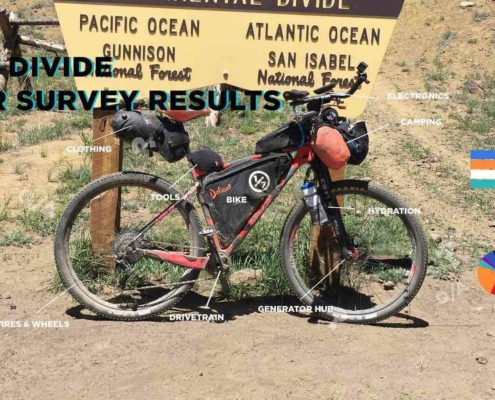 https://oneofsevenproject.com/wp-content/uploads/2019/05/rsz_1td_sr_cover_2.jpg
857
1493
Craig Fowler
http://oneofsevenproject.com/wp-content/uploads/2017/01/1of7-logo-lockup-grey-1132x212-300x56.png
Craig Fowler2019-05-27 15:12:412024-07-26 11:35:37Tour Divide Survey: Essential Gear Insights for New Riders
https://oneofsevenproject.com/wp-content/uploads/2019/05/rsz_1td_sr_cover_2.jpg
857
1493
Craig Fowler
http://oneofsevenproject.com/wp-content/uploads/2017/01/1of7-logo-lockup-grey-1132x212-300x56.png
Craig Fowler2019-05-27 15:12:412024-07-26 11:35:37Tour Divide Survey: Essential Gear Insights for New Riders


Simply clicking on the links below with our affiliates supports the Project.
Or checkout our Deals page to save big!


