As an affiliate partner, One of Seven Project earns a commission for purchases made through any product, brand logo links, or banner ads on this page. Thanks for your support!

One of the hardest parts of the AZTR 800 is the Hike-A-Bike (HAB) of the Grand Canyon. It’s a 21.7 mile stretch of trail with 6300′ of descending and 5500′ climbing, where your bike cannot touch the ground. The physical act alone is monstrous, but so is figuring out how to carry your bicycle properly. Hopefully this Bikepacking Carrying Harness 101 article will help you design and create the perfect harness for you.
The biggest mistake you can make is under estimating just how hard carrying your bike across the canyon is. It will be one of the hardest things you’ve even done, just ask anyone who’s done it.
I worked with others to put together this article and show you the different types of harness being used. You’ll learn what worked, what didn’t work, what they’d do differently, and more. Keep reading to find out more.
Table of Contents:
Shopping with our affiliates helps fund the development of content like this.
Name:
Bike used:
Specialized Fat Boy
Description of harness:
Empty Hyperlite Mountain gear packs. (and various extra straps to attach bike)
Thoughts on set up:
What would you do differently next time:


Name:
Lael Wilcox
Bike used:
Specialized Diverge
Description of harness:
Mission Workshop backpack designed specifically for this trip based on their 20 liter R6 Arkiv pack. Erik Nohlin collaborated on design.
Pros/What worked:
Really cushy, comfortable shoulder straps on my backpack. I only had to use 2 Voile straps to attach the bike to it.
Cons/What didn’t work:
The waistband would benefit from some additional padding. The rear wheel was a little low and would, at times, hit obstacles while walking on flat terrain. It would be nice to add a strap (maybe extending from the fork) to pull the bike closer to my shoulders on climbs..
What would you do differently next time:
Nothing really. Carrying a bike on your bike is always hard. I benefited from a really lightweight set up, but I was still definitely sore afterwards. Maybe I would train a bit more leading into the trip 🙂


Name:
Craig Fowler
Bike used:
Giant XTC Advanced + (set up 29er)
Description of harness:
I borrowed the bike carrying harness I used from a friend. It consisted of a hip belt from a backpack and shoulder straps. You tied the head tube to the hip belt and the shoulder straps attached to the seat tube near your shoulders.
Pros/What worked:
Super simple
Cons/What didn’t work:
I had to wrap it around my seat bag and carried it from the start. I added extra bulk to my seat bag and was one more thing to worry about.
It put a lot of pressure on my lower spine and hips.
What would you do differently next time:
It worked okay but put a lot of pressure on my spine. Next time I would flip the bike over to better distribute the weight. I would also add some more padding, especially on the hip belt. There was a gap between the two hip pads where normally a pad on the backpack would be. I’d fill this space with a pad. The shoulder straps also attached to the back of the hip belt for some reason. I would attach them to the normal position at the front.


Name:
Kurt Refsnider
Description of harness:
My setup for the Canyon portage in 2018 was a worn-out mountaineering pack that I shipped ahead to the Grand Canyon Village post office, along with some trekking poles and old running shoes. I ended up switching out of the running shoes at the river and back into my Pearl Izumi X-Alp shoes since the stiffer sole was more comfortable with all the weight on my back.
The poles, just as they were during my 2010 adventure on the AZT, were invaluable in helping my tired legs get me up to the North Rim. And given the short business hours of the post office in the park, I had carried a set of backpack straps that could be attached to my waist pack just in case I couldn’t get the pack from the mail. Fortunately, I didn’t have to use that setup.
Tips:
There’s nothing too complicated about strapping a bike to a backpack, but hiking 20+ miles with the setup means that any little discomfort is going to probably turn into a very big discomfort.
Having a backpack designed to carry some weight rather than an ultralight, minimalist pack or basic hydration pack is ideal.
Keeping the fork toward the ground gets weight as low as possible, but make sure that no part of the bike hits you or the ground when going up or down 18″-tall steps.
Keep food and water accessible so that you don’t need to frequently pull the whole concoction off in order to find snacks or water.
Final Thoughts:
However your setup ends up coming together, make sure you test it thoroughly ahead of time. And don’t forget to include quite a bit of hiking or running in your preparations for the AZT – your legs will thank you.


The Project offers the best Planning aids / guides to help you plan and execute your ride. With our Planning Aids, you'll have the most information to assist you with your planning and ride.


Checkout all our Planning Aids at our store. (Tour Divide, GDMBR, Arizona Trail, Colorado Trail, Kokopelli Trail, TNGA, Coconino 250, and Bay Circuit Trail). Southbound and Northbound, as well as metric versions are available depending on the route.
Name:
Liz Sampey
Description of harness:
To carry my bike through the Grand Canyon, I used a 35L Osprey pack that I sent to myself at the post office in Flagstaff along with a pair of ultralight trekking poles. I pulled my handlebar roll and seat post bag off the bike and stuffed them in the pack. To anchor the bike to the pack I pulled both my wheels off and anchored my frame with my derailleur above my head.
I used two thin cam straps, Surly Junk Straps, to secure the frame to the pack. Then I nested the wheels on the bike frame so that they weren’t sticking up above my head. Used a few small straps to keep those together. It was a tight little package and carried well.
I was really glad I had the full size pack and trekking poles; they were worth the Post Office stop. For hiking I just used my bike shoes, Pearl Izumi X-Alp Elevate, but I pulled the cleats out. I’d do it all exactly the same way again.


Name:
Paul Wissenbach
Bike used:
Salsa Woodsmoke 29er
Description of harness:
Osprey Stratos 34. The load adjuster straps were pulled through the buckles and then re-threaded around the seat tube of the bike and provided the primary load bearing function. The sleeping bag straps were hooked around the front fork.
Pros/What worked:
Cons/What didn’t work:
It was difficult to get the bike/pack on and off due to how heavy. I ended up breaking one of the tiny buckles on the straps that hooked around the fork. I was able to tie it around the fork, and I was able to later get a replacement part from Osprey.
What would you do differently next time:
Name:
Dylan Gonda
Bike used:
Giant Anthem
Description of harness:
Pros/What worked:
Cons/What didn’t work:
The shoulder straps hurt my shoulders a ton.
It was difficult to get the bike/pack on and off due to how heavy. I ended up breaking one of the tiny buckles on the straps that hooked around the fork. I was able to tie it around the fork, and I was able to later get a replacement part from Osprey.
What would you do differently next time:


Here are some tips to consider when figuring out your set up:
There are two (2) permits needed to race the AZTR 800. The 300 does NOT require a license. You need a permit if you plan on sleeping within the Grand Canyon and one to crosses a State Land Trust. The Land trust permit is $15 and can be found here.
You can get your camping permit from the Backcountry Ranger Station at the South Rim Village. Permits are $18. You’ll be getting a walk up permit. Ask if you can stay in the Stock Camp at Phantom Ranch. It’s convent and close to the trail. More information can be found here.
It’s very important to note that it’s illegal for one’s bike wheels to touch the ground inside the Grand Canyon (below the rim). You must carry your bike from the South Rim to the North Rim. The use of the Grand Canyon by racers is by special permission from the Park Service and can be taken away. This is a must, please follow the rules.
From what we can see here there is no one right way to carry your bike on your back and you can be pretty sure, it’s going to suck. Expect to have sore shoulders and hips (and legs from the actually hiking).
Most people simply just strap their bike and wheels to an empty pack of their choice and go for it. (If you’re doing a long carry like the Grand Canyon be sure to have extra straps in case one or two of yours break. Voile straps are great addition to any bikepacking gear list.) Like with most things, the best advice we can give is to test different set ups and find what works best for you. There’s no wrong answer here, but some might be better than others.
Read these next or checkout the main resource page.


Dive into all three gear lists from the Bikepacking Triple Crown, and find pros & cons; things I’d do differently; and tips.


In depth look at what I would bring for gear and why, if I rode the Tour Divide, CTR, AZTR, Kokopelli Trail, and Bay Circuit Trail again.


Curios to know what gear other riders used to get to the finish line? Checkout our Rider Surveys to find out what works or to take the survey yourself.
 https://oneofsevenproject.com/wp-content/uploads/2021/02/rsz_ce61a8f9-0b12-4e41-b403-e902df8f4593.jpg
857
1493
Craig Fowler
http://oneofsevenproject.com/wp-content/uploads/2017/01/1of7-logo-lockup-grey-1132x212-300x56.png
Craig Fowler2021-02-04 11:44:292024-10-24 15:06:14Bikepacking – How to Care for Your Butt
https://oneofsevenproject.com/wp-content/uploads/2021/02/rsz_ce61a8f9-0b12-4e41-b403-e902df8f4593.jpg
857
1493
Craig Fowler
http://oneofsevenproject.com/wp-content/uploads/2017/01/1of7-logo-lockup-grey-1132x212-300x56.png
Craig Fowler2021-02-04 11:44:292024-10-24 15:06:14Bikepacking – How to Care for Your Butt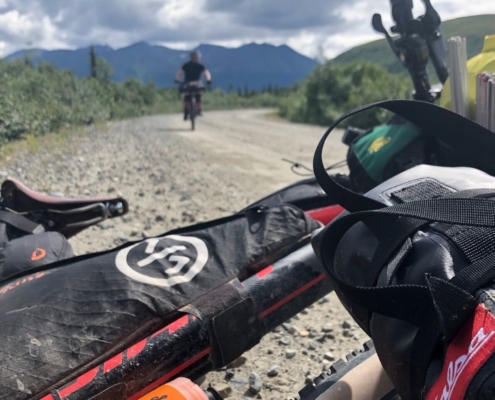 https://oneofsevenproject.com/wp-content/uploads/2020/03/Untitled-design-24.jpg
857
1493
Craig Fowler
http://oneofsevenproject.com/wp-content/uploads/2017/01/1of7-logo-lockup-grey-1132x212-300x56.png
Craig Fowler2020-05-19 10:09:312024-10-25 07:44:26Most Common Bikepacking Injuries
https://oneofsevenproject.com/wp-content/uploads/2020/03/Untitled-design-24.jpg
857
1493
Craig Fowler
http://oneofsevenproject.com/wp-content/uploads/2017/01/1of7-logo-lockup-grey-1132x212-300x56.png
Craig Fowler2020-05-19 10:09:312024-10-25 07:44:26Most Common Bikepacking Injuries https://oneofsevenproject.com/wp-content/uploads/2018/02/tourdivide-roadmiles-mountains-1.jpg
857
1493
Craig Fowler
http://oneofsevenproject.com/wp-content/uploads/2017/01/1of7-logo-lockup-grey-1132x212-300x56.png
Craig Fowler2020-03-06 13:25:442024-09-10 18:33:55Tour Divide Gear: What Worked Well and What’s Even Better
https://oneofsevenproject.com/wp-content/uploads/2018/02/tourdivide-roadmiles-mountains-1.jpg
857
1493
Craig Fowler
http://oneofsevenproject.com/wp-content/uploads/2017/01/1of7-logo-lockup-grey-1132x212-300x56.png
Craig Fowler2020-03-06 13:25:442024-09-10 18:33:55Tour Divide Gear: What Worked Well and What’s Even Better https://oneofsevenproject.com/wp-content/uploads/2019/07/rsz_img_4494.jpg
857
1493
Craig Fowler
http://oneofsevenproject.com/wp-content/uploads/2017/01/1of7-logo-lockup-grey-1132x212-300x56.png
Craig Fowler2019-07-05 10:28:362024-10-25 09:17:54The Shakedown Ride
https://oneofsevenproject.com/wp-content/uploads/2019/07/rsz_img_4494.jpg
857
1493
Craig Fowler
http://oneofsevenproject.com/wp-content/uploads/2017/01/1of7-logo-lockup-grey-1132x212-300x56.png
Craig Fowler2019-07-05 10:28:362024-10-25 09:17:54The Shakedown Ride https://oneofsevenproject.com/wp-content/uploads/2019/05/rsz_1img_5506.jpg
857
1440
Craig Fowler
http://oneofsevenproject.com/wp-content/uploads/2017/01/1of7-logo-lockup-grey-1132x212-300x56.png
Craig Fowler2019-05-17 09:29:522024-10-25 08:55:13Most Common Mistakes Bikepackers Make
https://oneofsevenproject.com/wp-content/uploads/2019/05/rsz_1img_5506.jpg
857
1440
Craig Fowler
http://oneofsevenproject.com/wp-content/uploads/2017/01/1of7-logo-lockup-grey-1132x212-300x56.png
Craig Fowler2019-05-17 09:29:522024-10-25 08:55:13Most Common Mistakes Bikepackers Make https://oneofsevenproject.com/wp-content/uploads/2018/11/Untitled-design-23-e1542400026690.jpg
857
1493
Craig Fowler
http://oneofsevenproject.com/wp-content/uploads/2017/01/1of7-logo-lockup-grey-1132x212-300x56.png
Craig Fowler2018-03-07 15:14:332024-10-24 14:47:28Bikepacking Navigation
https://oneofsevenproject.com/wp-content/uploads/2018/11/Untitled-design-23-e1542400026690.jpg
857
1493
Craig Fowler
http://oneofsevenproject.com/wp-content/uploads/2017/01/1of7-logo-lockup-grey-1132x212-300x56.png
Craig Fowler2018-03-07 15:14:332024-10-24 14:47:28Bikepacking Navigation


Simply clicking on the links below with our affiliates supports the Project.


