CHECKOUT ALL OUR GUIDES
Support the Project
Simply clicking on the links below with our affiliates supports the Project.
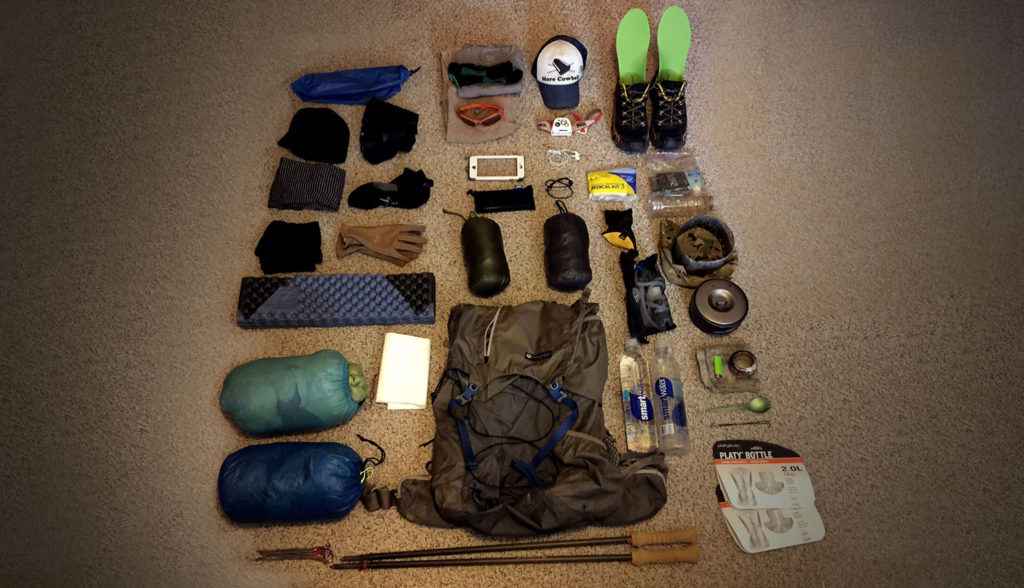
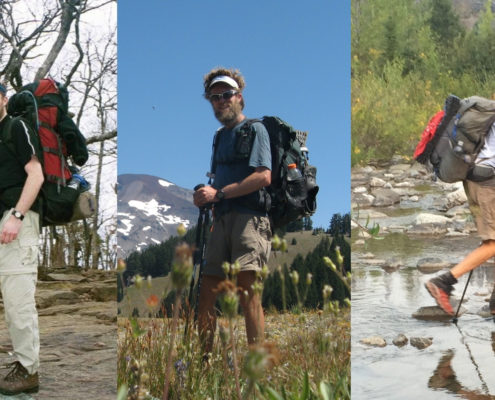
This page covers the hiking gear I used on the thru-hiking triple crown (Appalachian Trail, Pacific Crest Trail, and Continental Divide Trail). I cover everything from the shoes on my feet, to the pack on my back, and everything in between. My Proven Triple Crown Hiking Gear List should help you decide what is right for your gear list.
When I started hiking I was like most people, I didn’t have a clue. As a result, I made most of the classic backpacking/hiking rookie mistakes. Things like the wrong clothes and too many, thinking I needed more than I did, forgetting basic items and more. Throughout my hiking triple crown and thousands of miles of hiking I learned a lot, but also gained what I call “Trail Confidence“. It’s what allows one to take less, go further, see more and feel safe doing it.
Finally, it’s important to recognize that how you approach selecting your gear, which gear you bring and how it’s packed and used on trail is the same for an overnight hike, to a multi-day thru-hike like the Appalachian Trail. Furthermore, most of the gear is the same gear you’d take bikepacking. Checkout my page on bikepacking gear, or scroll down to continue with the hiking gear.
My posts AT vs. PCT and PCT vs. CDT might help you understand just how different the three trails of the Triple Crown.
Shopping with our affiliates helps fund the development of content like this.
Since its been a while since I hiked the Triple Crown, I made updated gear list to show what I would use for gear if I went back and thru-hiked the AT, PCT, or CDT. I call it my “If I Hiked…” series. Within each post you’ll see what I brought the first time, what I’d take today, and why I would make the change. I also touch upon my approach and goal for each trail, as both have changed as well.
If I Hiked the Appalachian Trail Again
If I Hiked the Pacific Crest Trail Again
If I Hiked the Continental Divide Trail Again – COMING SOON!
Like all gear, clothing is different from person to person. Most of the basics are the same but we all have little differences in our kit. Most of my changes to my kit were to things I wore day to day, and not my camp clothes. Comfort and utility are always two of the main factors for me when picking clothing items.
My goal is to always be as warm and dry as possible in any situation. As a result I strictly focus on using merino wool and down items over synthetic ones whenever possible. It took some work but I figured out the right set up, about 4000 miles. With that said, my kit is constantly changing when newer and better items become available.
CLOTHING SET UP BY TRAIL
APPALACHIAN TRAIL
WORN
hiking topsPACIFIC CREST TRAIL
WORN
CONTINENTAL DIVIDE TRAIL
WORN
Transition Pieces
Transition Pieces
Transition Pieces
Camp Clothes
Camp Clothes
Camp Clothes
APPALACHIAN TRAIL
The number one thing I did wrong on the AT was bring too many clothes. I would put my clothing on a major diet and really figure out what was truly needed and nothing more.
PACIFIC CREST TRAIL
When I hike the PCT I had trimmed down my clothing to a respectful level from that of the AT. Because of the sun I went for long sleeves and used both a button down shirt from the GAP and a short sleeve wool t-shirt with sun sleeves during the second half.
CONTINENTAL DIVIDE TRAIL
My clothes between the PCT and CDT where much different.
PROS:
As the first bullet points says my clothing kit was versatile. I was able to adapt to the conditions I faced and this gave me confidence.
CONS:
Both cons were a result of not testing gear thoroughly before hand and could have been avoided.
WHAT DIDN’T WORK:
Not having the right hat and Sunglasses on the CDT meant replacing them mid hike, costing me time and money.
THINGS I’D DO DIFFERENTLY:
FINAL THOUGHTS:
Clothing is no different from any other kind of gear. Figure out what works for you, bring less, and craft your clothing list based on the trail. What works for one might not work for the next.
TIPS:
My cooking kit started with a MSR Whisperlite International way before my Triple Crown. Over the years it evolved to what it is now. As my Trail Confidence grew and my trail diet formed what I cooked with and how I cooked it changed. Like more of my gear my Hiking Cook Set Up is all about simplicity.
When it comes to hydration my goal is just like that of cooking. I want simplicity. I don’t want to waste time filtering or bad tastes. I’ve used a range of filtration options and items to carry my water. In the end I use the simplest method available.
HYDRATION/COOKING SET UP BY TRAIL
APPALACHIAN TRAIL
HYDRATION
PACIFIC CREST TRAIL
HYDRATION
CONTINENTAL DIVIDE TRAIL
HYDRATION
COOKING
CLEAN UP
COOKING
CLEAN UP
COOKING
CLEAN UP
APPALACHIAN TRAIL
My choices for the AT were based on what was available at the time (2001) and what was accepted practices at the time. Most items were heavy, bulky, or time consuming. They worked but as I would learn there were best options all around.
PACIFIC CREST TRAIL
After my experiment of going ultralite on the Long Trail, my knowledge and Trail Confidence allowed me to make vast changes to how I cooked and filter, and what items I used to do both. The changes I made were to save weight and time. My custom wind screen built during the PCT solved the issue of a tippy stove/pot interface.
CONTINENTAL DIVIDE TRAIL
The only real difference between the PCT and CDT was changing from using Gatorade bottles to Smart Water bottles to carry/drink from. They Smart water bottles are slimmer making them a better fit in side pockets and they’re easier to get out while your pack is on.
PROS:
I really like my cooking and filtration set up as a unit. Without sounding like a broken record, I love their simplicity. They are also very reliable too.
CONS:
WHAT DIDN’T WORK:
Besides stability issues with canister stoves, most of my issues have revolved around filters that clog (most likely to improper maintenance on my part).
THINGS I’D DO DIFFERENTLY:
FINAL THOUGHTS:
Like any piece of gear, make sure you’re comfortable using it. Your hydration/cook set up should be no different. Find what works for you, don’t copy others.
TIPS:
When I did the AT the only electronic items I had were my watch, headlamp and film camera. As time went on electronics and the digital era influenced my gear choices greatly. As I carry more electronics keeping them safe as added another concern to my hiking.
Electronics have also changed my hiking in both positive and negative ways. One the positive side I have more information at my finger tips, which gives me more Trail Confidence. I can also reduce items by using my phone as a phone, camera, GPS, and journal. One the negative side electronics have made it harder to leave everyday life behind and disconnecting is harder.
ELECTRONICS SET UP BY TRAIL
APPALACHIAN TRAIL
PACIFIC CREST TRAIL
CONTINENTAL DIVIDE TRAIL
APPALACHIAN TRAIL
Electronics simple weren’t available on the scale they are today so they were limited during the time of my thru-hike.
PACIFIC CREST TRAIL
The big changes were a digital camera over film; electronic journal over paper; and addition of a cell phone and MP3. All of these meant power too.
CONTINENTAL DIVIDE TRAIL
As the list above show my CDT electronics were almost 3 times what my AT ones were. My headlamps gradually got brighter and more versatile (USB). My phone replaced my camera, mp3 and electronic journal.
PROS:
I think the bullet points above say it all.
CONS:
Hence why it’s my first bullet point I think monitoring your use of your phone is the biggest draw back.
WHAT DIDN’T WORK:
I found that when I try to rely on solar power to charge my electronics I’m constantly worrying about whether my solar panel is in the sun, rather than focusing on the trail. Plus they don’t keep up with power usage.
THINGS I’D DO DIFFERENTLY:
FINAL THOUGHTS:
Electronics are a double edge sword. They help simplify things but at the same time can complicate them. Personally I appreciate what my electronics allow me to accomplish and think there worth the effort.
TIPS:
Read these next or checkout the main resource page.
In depth look at what I would bring for gear and why, if I hiked the AT, CDT, CT, LT and PCT.